As you probably know, we have switched to IntelliJ IDE since 7.0 to bring better development experience. It does not mean that we completely abandoned all other IDE options for Java. In this tutorial, I will show how you can generate a project using CUBA CLI and import it into Eclipse IDE.
Fortunately, platform 7.0 does not require any custom Gradle integrations and projects can be opened using native Gradle integration in IntelliJ (even without CUBA plugin) and Eclipse.
![]() First of all, install the latest Eclipse IDE and CUBA CLI.
First of all, install the latest Eclipse IDE and CUBA CLI.
- Start your command line terminal and change directory to
eclipse-workspace - Run
cuba-cli - Run
create-appcommand.
CLI will ask you for parameters and generate a new project. Check CLI Quick Start Video.
- Run Eclipse IDE
- Use menu File - Import - Existing Gradle project
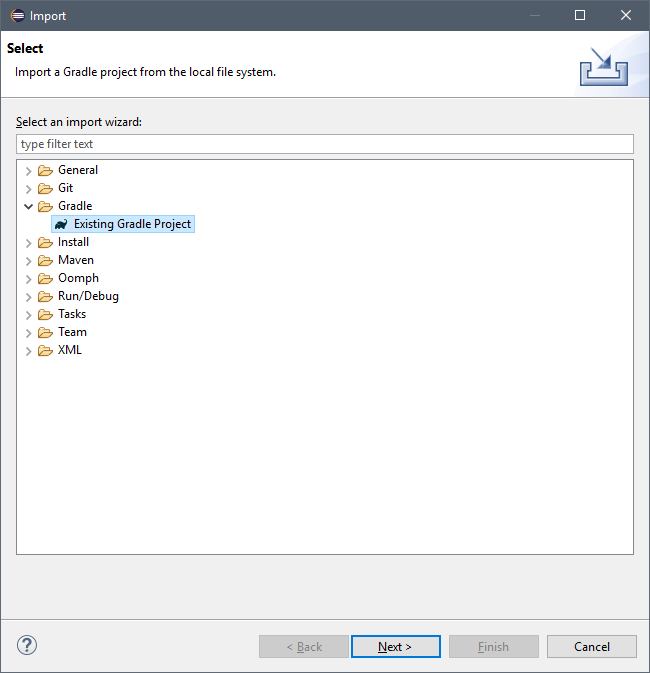
- Select project folder and click Finish

- After project imported and all dependencies downloaded you will see project modules and Gradle panel:
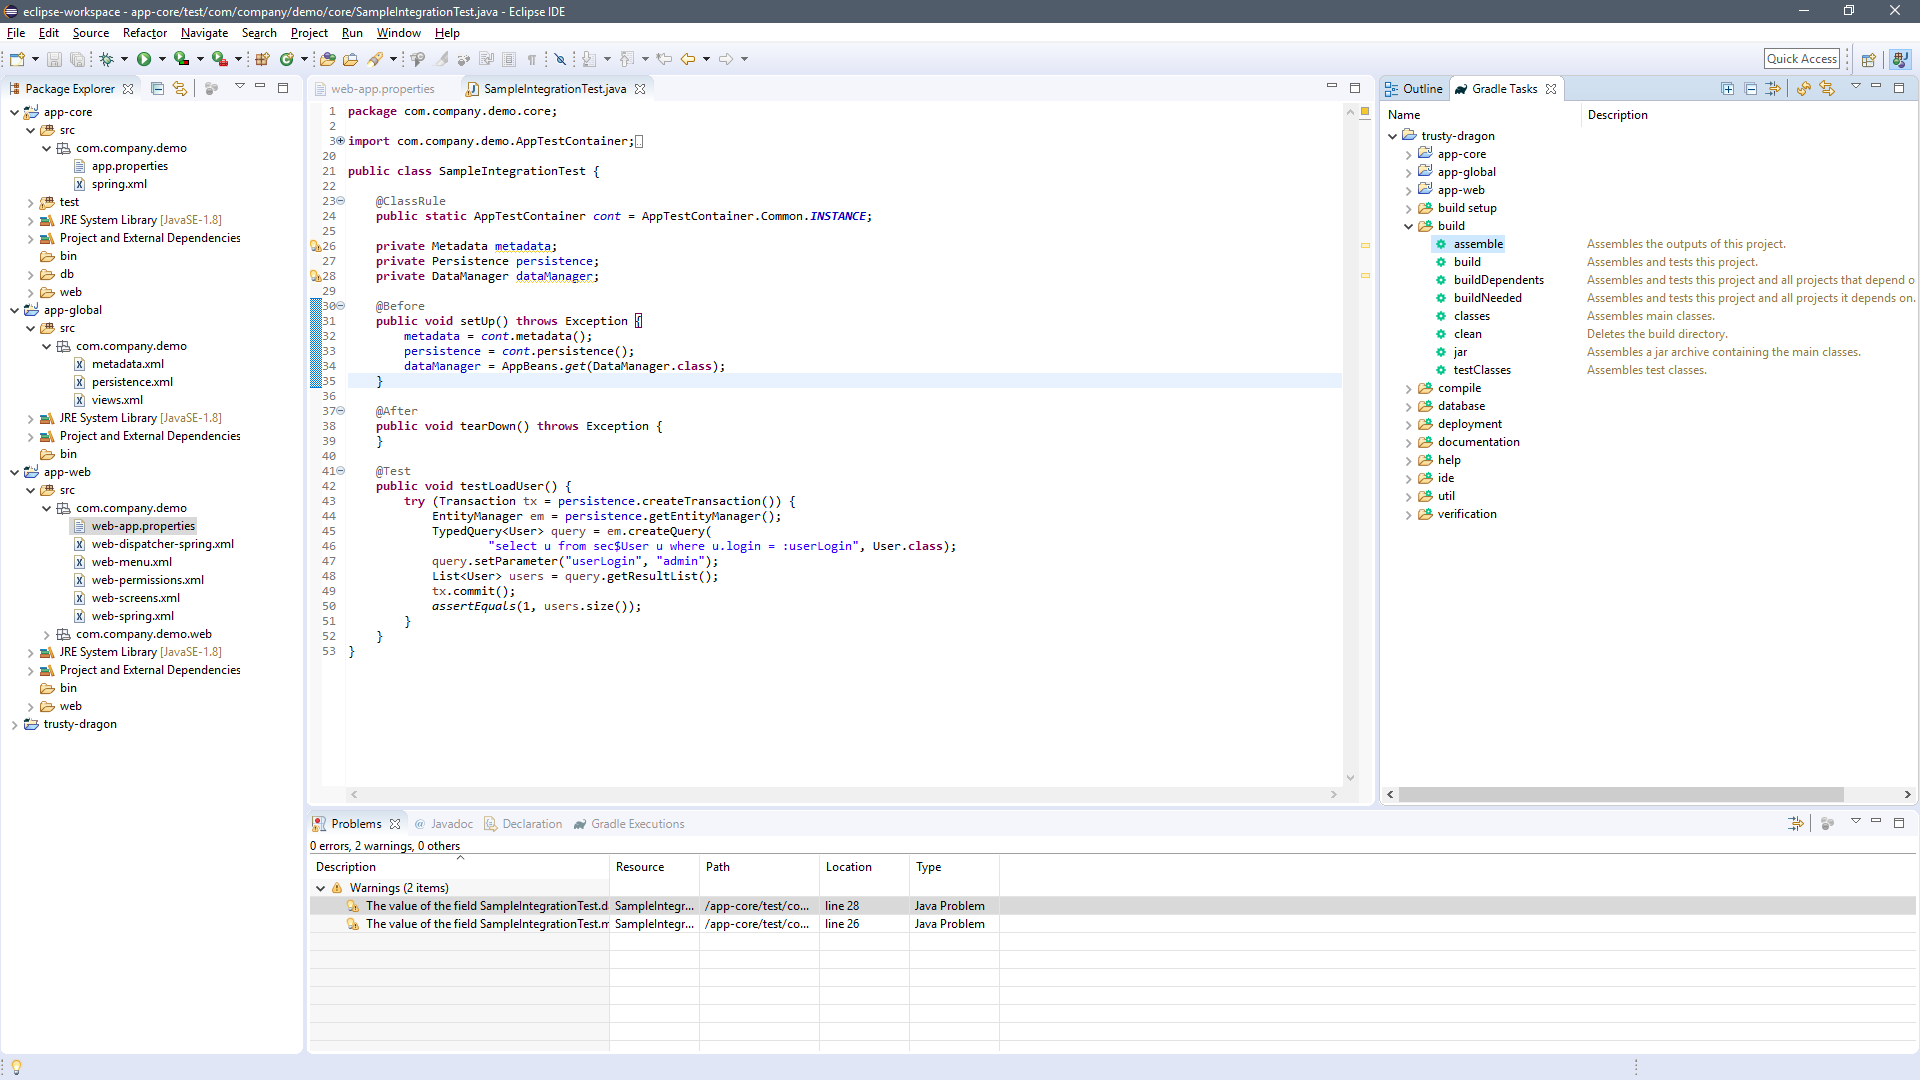
-
In order to build your solution use
assembleGradle task. -
How to run?
![]() If you are using HSQL then start database using Gradle task
If you are using HSQL then start database using Gradle task startDb
- Create database using Gradle task:
createDb - Setup local Tomcat instance: trigger
setupTomcatGradle task - Create a new Run configuration with 2 Gradle tasks:
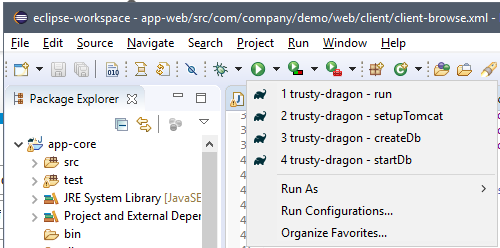
deploy start
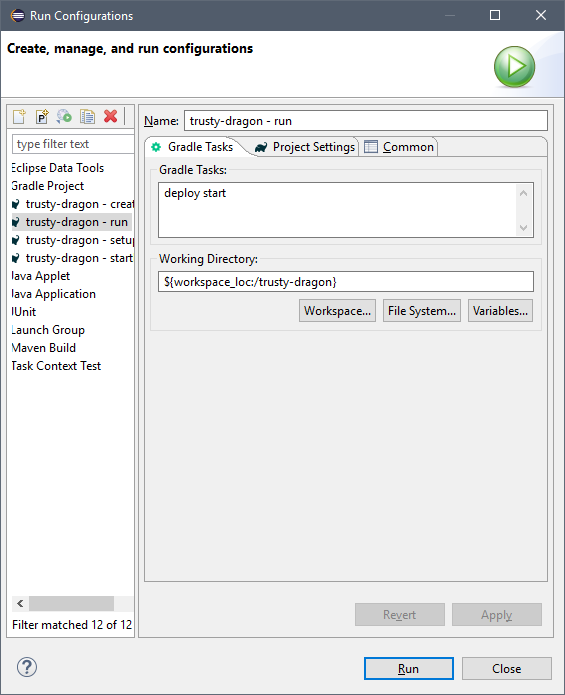
Now, you will be able to run an application using Run configurations menu.
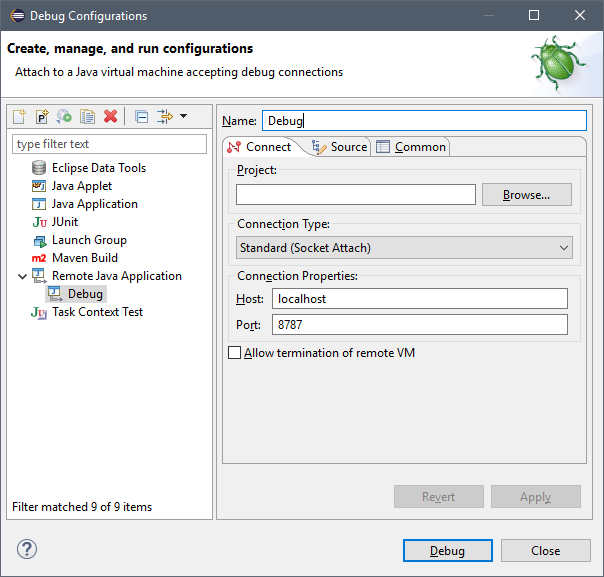
- How to debug?
Create a new Remote debug configuration with port 8787.